This simple example uses an ASP script to create a
form that allows the user to submit their personal information to a contact
list. The form stores the
information in an Access database, and the entire contact list displays on
another HTML page. Important! This example will only work with a server that has ASP extensions.
It will work with web sites located on the Oznet server, but it will not
work with sites located on K-States unix server.
This example uses the contact.mdb database created in the 1st part of the
tutorial. The database should be placed inside of a folder called "fpdb."
This database is creating by following these 3 parts:
4.1 Creating an Include page containing the DSN-less Connection
By saving the the connection inside of an include page, which allows us to
include the information stored in the include page inside of any ASP page, we
can store the connection string in only one location. Then if changes need
to be made to the connection, we only need to do this in one place.
Create a new folder called "contact", and inside of this folder
create another folder called includes.
Create a new text page called contactConn.inc, and place the following
code at the top of the page. The contactConn.inc page should also be
placed inside of the includes folder.
<!--#Include file="adovbs.inc"
-->
Next, add the connection
information below to the contactConn.inc page. Be sure to add this
code to the bottom of the contactConn.inc page.
<%
set conntemp=server.createobject("adodb.connection")
The connection for the contact
form is now stored in an includes page. You can open a connection to
the database on any page by including this page at the top of your form
pages by using the following code.
<!--#Include file="includes/contactConn.inc" -->
4.2 Creating a Form page (front end)
The Form page will allow the user to enter information into text boxes.
Open a new page in FrontPage, and save it with the name
"editContact.asp" inside of the contact folder.
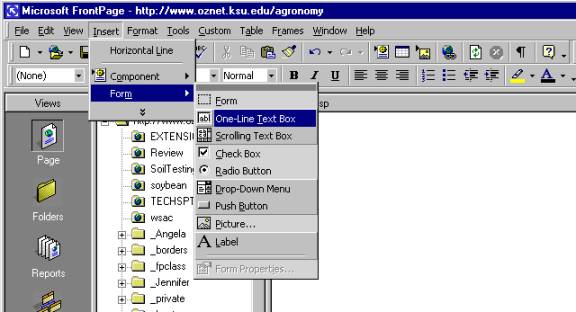
Using the Menu at the top, select Insert/Form/One-Line Text
Box. (See Figure 1)
Figure 1
Hit the Enter key to return to the next line, and again select
Insert/Form/One-Line Text Box. (see Figure 1)
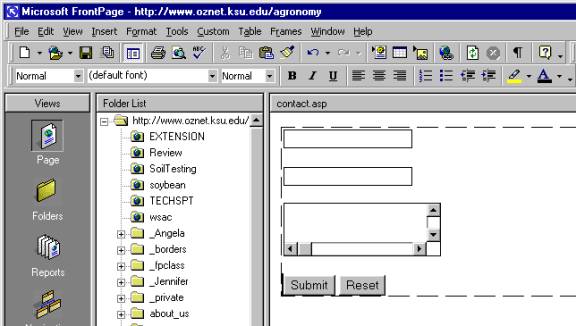
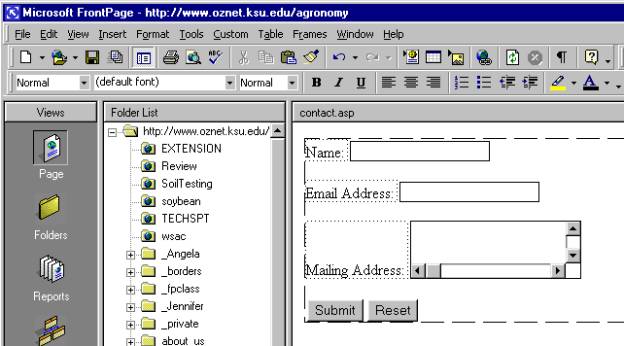
Hit the Enter key to return to the next line, and select Insert/Form/Scrolling
Text Box. This text-box allows the user to enter multiple lines of text.
Once you hit the Enter key to return to the next line, your form should look
like the form in Figure 2.
Figure 2
Place your cursor in front of the first One Line Text-Box. To position the
cursor directly in front of the Text-Box, just select the Text-Box with the
mouse, and then use the left arrow key on the keyboard. Now, type the word
"Name:".
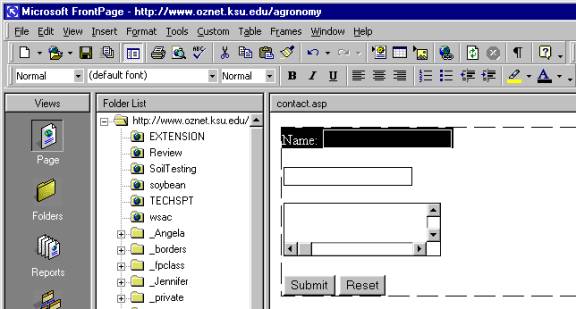
Select both the text "Name:" and the Text-Box following the
text. (See Figure 3)
Figure 3
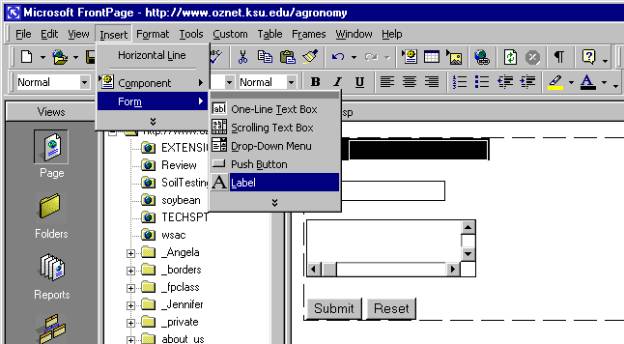
From the top menu, select Insert/Form/Label. (See Figure 4) After you
create the label, a dotted box will surround "Name:".
Figure 4
Create a label for the next Text-Box called "Email Address:"
using steps 1 through 3 again.
Create a label for the Scrolling Text-Box called "Mailing
Address:" using steps 1 through 3 again.
When you finish, the form should look like the form in Figure 5.
Figure 5
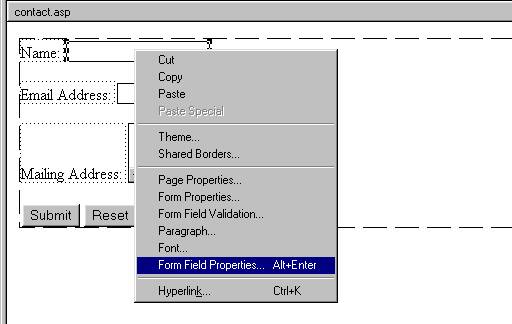
Using the mouse, right-click on the first text-box. Select Form Field
Properties. (See Figure 6)
Figure 6
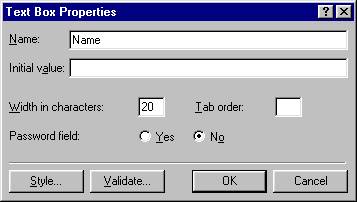
In the Text Box Properties Menu, type "Name" as the Name. (See
figure 7)
Figure 7
Name the second form field "EmailAddress". Follow steps 1 and 2
for the Text Box labeled "Email Address:".
Name the third form field "MailingAddress". Follow steps 1 and 2
for the Text Box labeled "Mailing Address:".
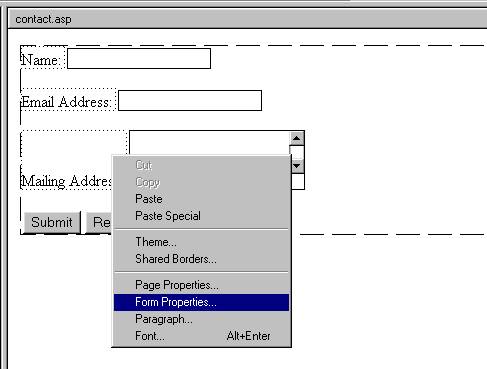
Right-Click anywhere inside of the form, which is marked by a box created
from dashed lines.
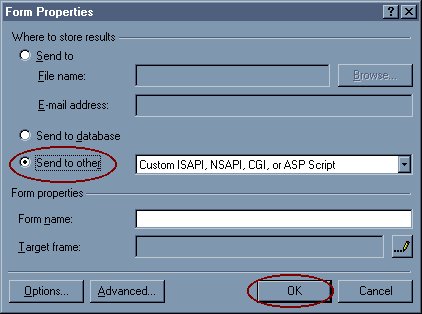
Select the menu option called Form Properties. (See Figure 8)
Figure 8
In the Form Properties menu, select the Send to database option as in
Figure 9.
Figure 9
In the html view look for the <form> tag, and change it from:
<form method="POST"
action="--WEBBOT-SELF--">
to:
<form method="POST" action="addContact.asp">
This will allow the information from
editContact.asp to be sent to addContact.asp where the information will get
added to the database.
4.3 Creating an ASP page to store the results in the database (back end)
Now we need to create addContact.as
Open a new page in FrontPage, and save it with the name
"addContact.asp" inside of the contact folder.
In the html view, remove the html code from the page, and
place the following code at the top of the page in the html view.
The previous code opens up a recordset containing all of
the contact information from the Results table in the contact.mdb
database. It adds a new row or contact, inserts their information, and
closes the recordset. Then, we reopen the specific contact that we
just added, and send the ID number to the contactConfirmation.asp page using
a querystring.
4.4 Displaying the information in the database
After inserting the information into the database, it should be retrieved and
displayed on a confirmation page.
Open a new page in FrontPage, and save it with the name
"addContact.asp" inside of the contact folder.
In the html view, remove the html code from the page, and
place the following code at the top of the page in the html view.
The code above opens up a recordset containing the information from the
contact that was just added. It opens the recordset using a query
instead of opening the whole table. The query is filtered using the
ID number stored in the querystring in the URL.
The contact database application is now finished. You should now
be able to use editContact.asp to add new contacts to the database.