1 Creating an Access Database, a Form Page, and a Results
Page Using Microsoft FrontPage Wizards
Back to Tutorial
This simple example uses FrontPage to create a
form that allows the user to submit their personal information to a contact
list. The form stores the
information in an Access database, and the entire contact list displays on
another HTML page. Important! This example will only work with a server that has ASP extensions.
It will work with web sites located on the Oznet server, but it will not
work with sites located on K-States unix server.
1.1 Creating the form fields
Form fields allow the user to enter information in a form.
This example uses 2 One-Line Text Boxes and 1 Scrolling Text Box.
-
Open a new page in FrontPage, and save it with the name
"contact.asp" (The page can be called anything, but the extension
must be .asp).
-
Using the Menu at the top, select Insert/Form/One-Line Text
Box. (See Figure 1)
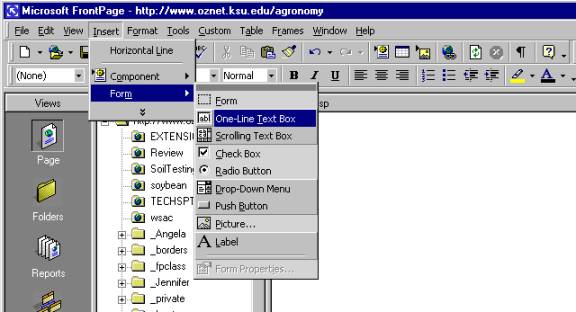
Figure 1
-
Hit the Enter key to return to the next line, and again select
Insert/Form/One-Line Text Box. (see Figure 1)
-
Hit the Enter key to return to the next line, and select Insert/Form/Scrolling
Text Box. This text-box allows the user to enter multiple lines of text.
-
Once you hit the Enter key to return to the next line, your form should look
like the form in Figure 2.
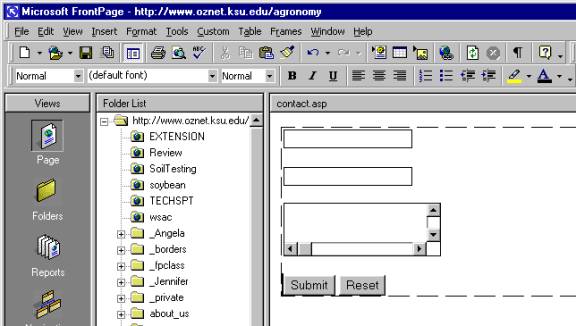
Figure 2
1.2 Adding Labels to the Form Fields
Labels contain text, and each label refers to one field. The text tells the
user what information to put into the form field.
- Place your cursor in front of the first One Line Text-Box. To position the
cursor directly in front of the Text-Box, just select the Text-Box with the
mouse, and then use the left arrow key on the keyboard. Now, type the word
"Name:".
- Select both the text "Name:" and the Text-Box following the
text. (See Figure 3)
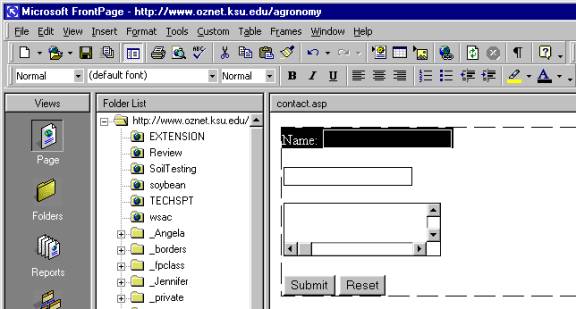
Figure 3
- From the top menu, select Insert/Form/Label. (See Figure 4) After you
create the label, a dotted box will surround "Name:".
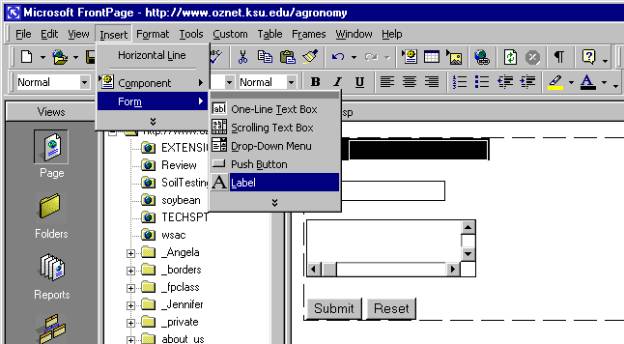
Figure 4
- Create a label for the next Text-Box called "Email Address:"
using steps 1 through 3 again.
- Create a label for the Scrolling Text-Box called "Mailing
Address:" using steps 1 through 3 again.
- When you finish, the form should look like the form in Figure 5.
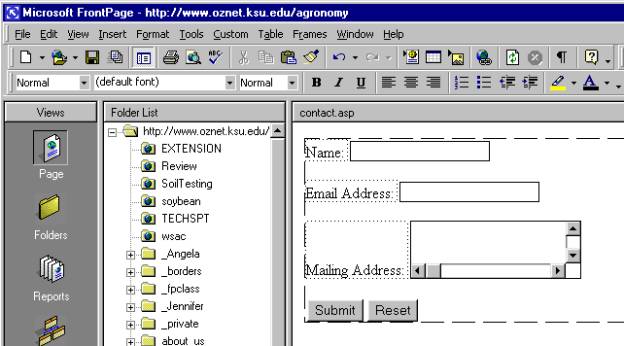
Figure 5
1.3 Naming the Form Fields
The database uses the names of the form fields, so we want to pick names for
the form fields that relate to their labels. This makes it easy to use the
information later.
- Using the mouse, right-click on the first text-box. Select Form Field
Properties. (See Figure 6)
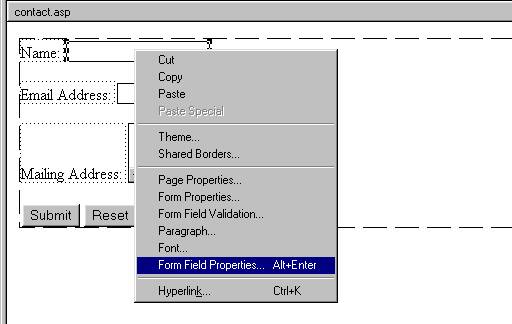
Figure 6
- In the Text Box Properties Menu, type "Name" as the Name. (See
figure 7)
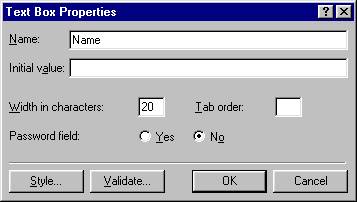
Figure 7
- Name the second form field "EmailAddress". Follow steps 1 and 2
for the Text Box labeled "Email Address:".
- Name the third form field "MailingAddress". Follow steps 1 and 2
for the Text Box labeled "Mailing Address:".
1.4 Creating a Database for the form
The Database will contain a table called results, which will store all
information submitted by the form.
- Right-Click anywhere inside of the form, which is marked by a box created
from dashed lines.
- Select the menu option called Form Properties. (See Figure 8)
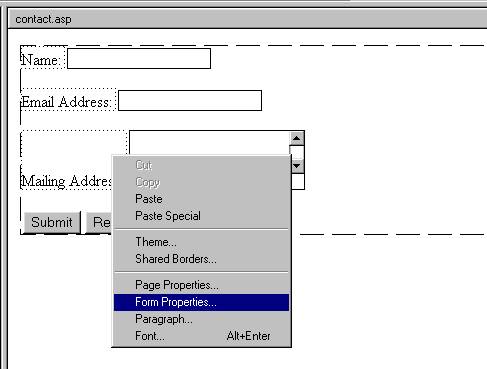
Figure 8
- In the Form Properties menu, select the Send to database option as in
Figure 9.
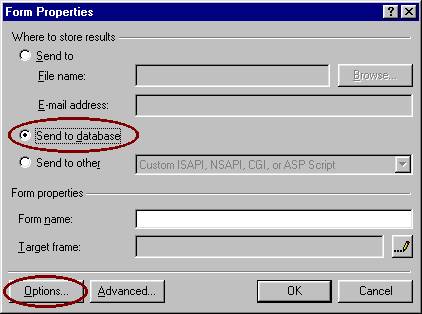
Figure 9
- In the Form Properties menu, select the Options button in the lower left
hand corner. (See Figure 9)
- In the Options for Saving Results to Database menu, select the Create
Database button. (See Figure 10)
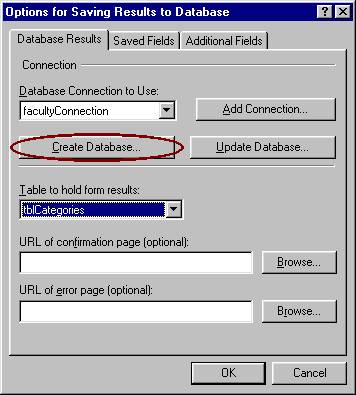
Figure 10
- A dialog box should pop up after FrontPage finishes. It simply says that
it successfully created a database called contact.mdb and a connection to
the database called contact. Select OK for the dialog box and on each of the
open menus.
- You have finished creating a form that will connect to a database. You can
try it out in the browser, and you should get a confirmation page after
submitting your information.
1.5 Displaying results from a Database using MS FrontPage
In order to view the contacts stored in the database, you can create a web
page that lists out all the information contained in the database. Again, this
will only work for web sites located on a server with ASP extensions.
- Open a new page in FrontPage, and save it with the name "contactList.asp"
(The page can be called anything, but the extension must be .asp).
- From the main menu at the top, select Insert/Database/Results. (See Figure
11)
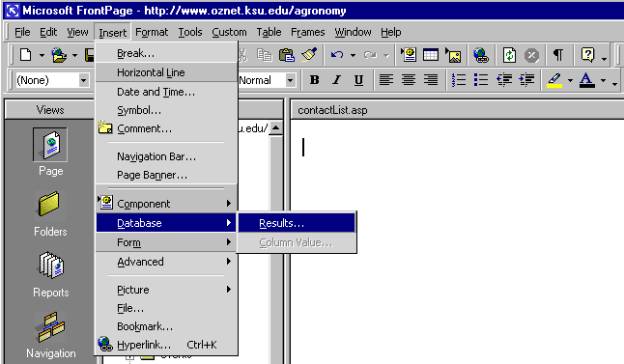
Figure 11
- In the Database Results Wizard - Step 1 of 5 menu, select
"contact" as the existing database connection. (See Figure 12)
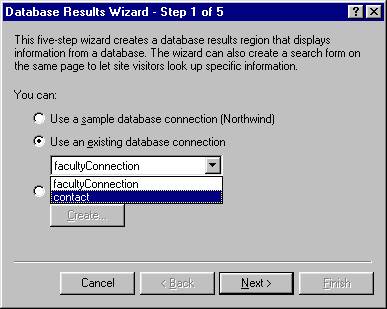
Figure 12
- Select the Next > button. 5. In the Database Results Wizard - Step 2 of
5 menu, select the Next > button.
- In the Database Results Wizard - Step 3 of 5 menu, select the Next >
button.
- In the Database Results Wizard - Step 4 of 5 menu, select the Next >
button.
- In the Database Results Wizard - Step 5 of 5 menu, select the Display all
records together option. (See Figure 13)
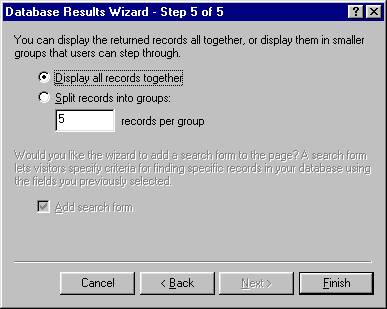
Figure 13
- Select the Finish button, and a table should appear on your page similar
to the table in Figure 14.
- Save the page, and when you view it in the browser it should list all the
information stored in your database.
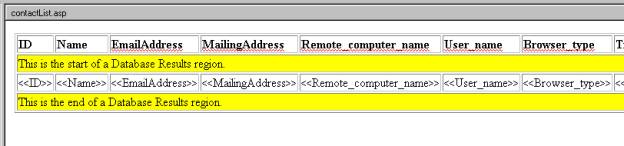
Figure 14
- You have finished creating an HTML page to display the results from a
database.